How to Reply to Slack Messages from Zendesk


If you're using Slack for customer support, you're likely doing doing customer support directly from the Slack app. This can be overwhelming unless you properly organize your customer channels, but more importantly, it can become a separate tool than your primary ticketing platform, such as Zendesk, Intercom, Salesforce Service Cloud, Unthread, etc.
In this post, we'll go into specifically how to connect your Slack messages to a Zendesk account. Check back later for posts on other ticketing platforms.
Companies that do customer support over Slack & Zendesk and are looking to use Zendesk as their primary support solution
1. Build Your Own Integration (not recommended)
2. Use Unthread's 2-Way Slack to Zendesk Sync (recommended)
Approach 1: Build Your Own Integration
Difficulty: Hard
Time to build: 20-40 hours
Create a Slack app
Slack provides a great set of documentation to build your own Slack app to extend their platform with custom functionality.
Required scopes:
channels:readchannels:historychat:write:user(to send on behalf of user) orchat:write:bot(to send on behalf of your app)
Add Slack Event Subscriptions
Webhooks will allow you to listen for new messages being posted in channels. This will be important to detect when a customer reaches out in a channel.
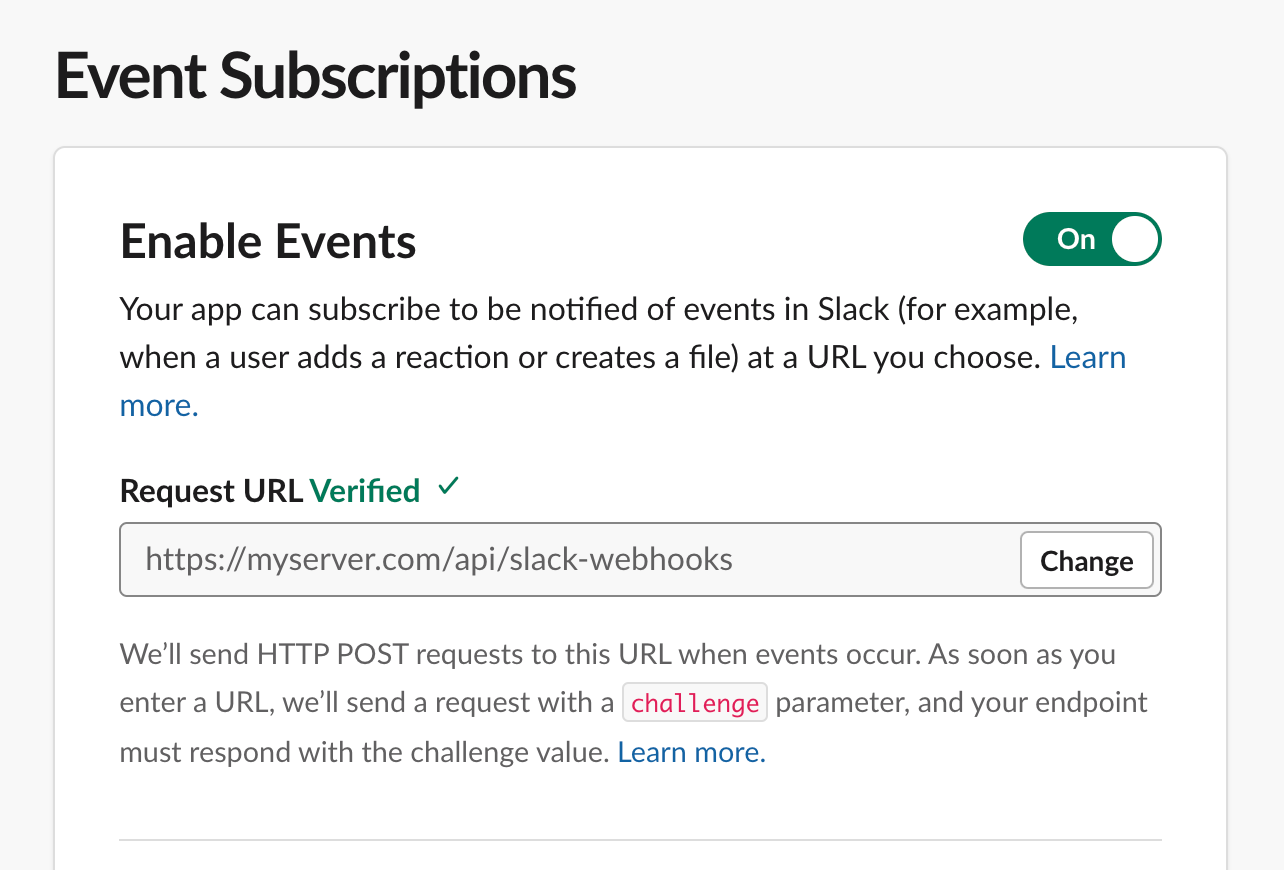
Define a route on your backend at the path api/slack-webhooks, and you will start to get notified of new changes in a channel. To learn more about Event Subscriptions, you can read more in the Slack documentation.
Create a Zendesk Channel App
From your Admin center in Zendesk, navigate to the "Apps & Integrations" section, and select "Channel apps".
Channel apps are a great way to share information bidirectionally between Zendesk and a 3rd party application.
Build the Zendesk App
Building an app from scratch can be complicated, and we recommend a moderate level of development experience to continue beyond this point.
mkdir -p projects/zendesk_slackFrom here, create a file called app.py
import os
import json
import urllib.parse
from pathlib import Path
from bottle import route, run, request, response, template

@route('/')
def show_home():
    return '<p>Integration service for a Zendesk Slack connection</p>'

if os.environ.get('ENVIRONMENT') == 'production':
    run(host="0.0.0.0", port=int(os.environ.get("PORT", 5000)))
else:
    run()
Test the application by running python3 service.py in your terminal.
After this point, you will see an application running live at http://localhost:8080/
Now the app is working, you'll want to add the endpoints that can actually sync the data in both directions.
Create an .env file in the root directory with the following properties:
ZENDESK_URL="{zendesk_url}"
ZENDESK_EMAIL="{email}"
ZENDESK_PASSWORD="{password}"
ZENDESK_AGENT_ID={zendesk_user_id}
SLACKBOT_TOKEN={slackbot_token}
Replace each of the { } fields with the actual fields from your Zendesk and Slack accounts.
Create a new config.py file that uses these values to create a config:
import json
import urllib.parse
import arrow
import requests
import os
from dotenv import load_dotenv

load_dotenv()

def get_hc_settings():
    return {
        'base_url': os.environ.get('ZENDESK_URL'),
        'credentials': (os.environ.get('ZENDESK_EMAIL'),
                        os.environ.get('ZENDESK_PASSWORD')),
        'agent_id': os.environ.get('ZENDESK_AGENT_ID')
    }
Back in your app.py file, you can now include import config, which will give you access to the get_hc_settings() function to configure your app correctly.
Post to Slack
Posting to Slack can be done through the Slack SDK. Create a new file called slack.py to add a function for sending to Slack:
import logging
logging.basicConfig(level=logging.DEBUG)

import os
from slack_sdk import WebClient
from slack_sdk.errors import SlackApiError

slack_token = os.environ["SLACK_BOT_TOKEN"]
client = WebClient(token=slack_token)

try:
    response = client.chat_postMessage(
        channel="C0XXXXXX",
        text="Hello from your app! :tada:"
    )
except SlackApiError as e:
    # You will get a SlackApiError if "ok" is False
    assert e.response["error"]    # str like 'invalid_auth', 'channel_not_found'
You can follow along with the rest of the Zendesk tutorial here:
- Part 1: Building the integration service
- Part 2: Connecting to the channel (Slack in this case)
- Part 3: Building an admin interface
- Part 4: Deploying the application
Approach 2: Use Unthread's 2-Way Slack to Zendesk Sync
Difficulty: Easy
Time to build: 15 minutes
Create an Unthread Account
You can create a free account at unthread.io and start a 14-day trial.
Connect to Slack
The app will ask you connect your Slack account in one click.
Choose the Channels to Track
Select which accounts that you'd like to sync into Zendesk.
Add the Zendesk App
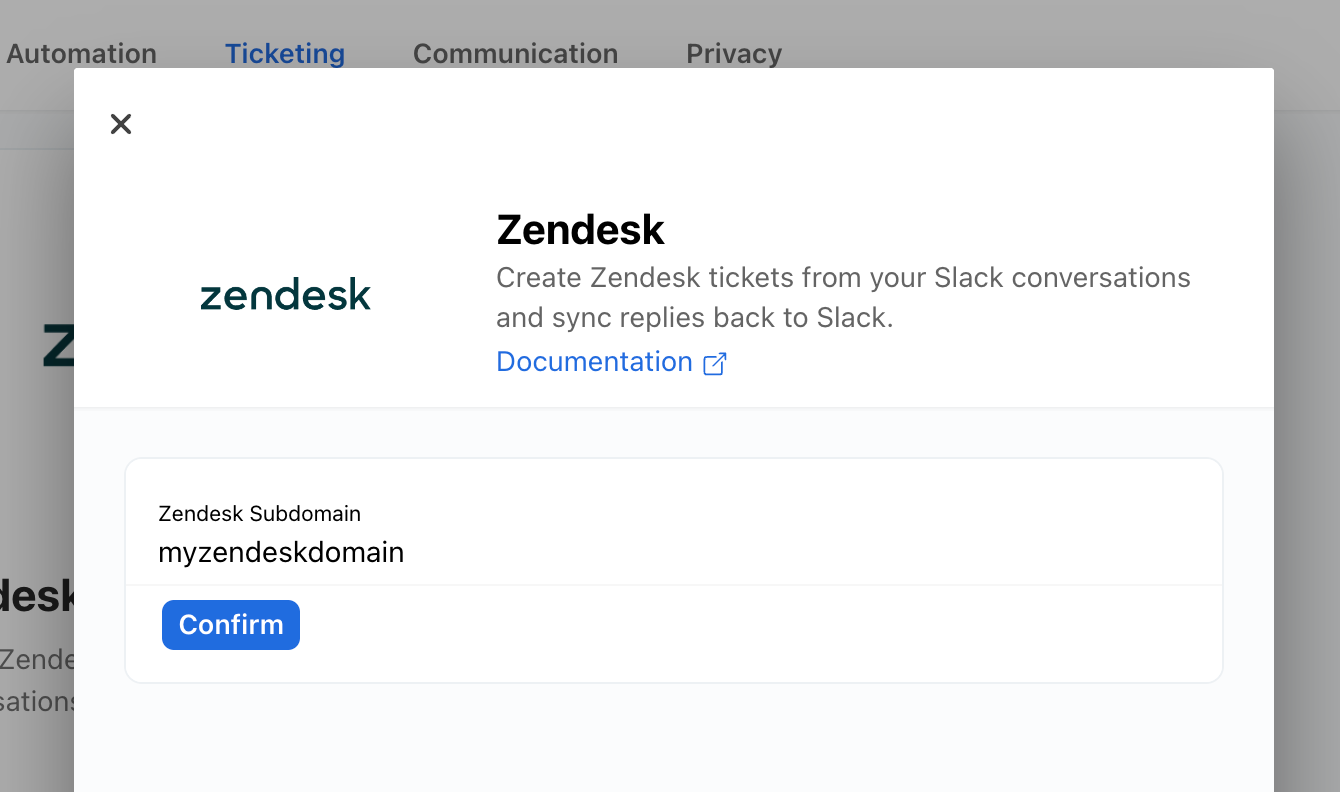
Navigate to the "Settings" > "Apps & Integrations" tab, and find the Zendesk app. Click "Connect" and enter your unique Zendesk subdomain. This is the path that you see when you access the Zendesk web app.
Done!
Now new conversations tracked by the Unthread Slack app will automatically post to Zendesk, and your replies that are sent from Zendesk will automatically post back into the Slack channel.
Conclusion
Perhaps we're biased, but we'd recommend enabling the Zendesk integration in your Unthread account over building your own custom solution.
If you'd like to see a live demo or get more tips on building out customer support integrations, reach out to us any time at hello@unthread.io!